Many USB devices come with a write protection button. Sometimes when this button remains on the write protection, an error will get displayed on copying, pasting and deleting any file from the media device. To remove the error, check the button on the side of the SD card if the button is on then put it off and by this Write Protection of USB will get removed.
3 Method: Check To Ensure The USB Drive Isn’t Full
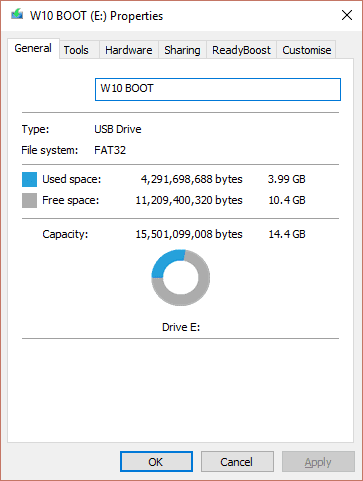
Sometimes, our USB flash drive shows us Write protect error due to insufficient storage. To check out if your drive is full or not, open Windows Explorer and right-click on your USB drive and select “Properties”.

Check To Ensure The USB Drive Isn’t Full
The properties section will show you the File system along with Storage capacity. If your disk space is full, you need to remove some files to avoid the Write Protect error.
4 Method: Check For Individual Files
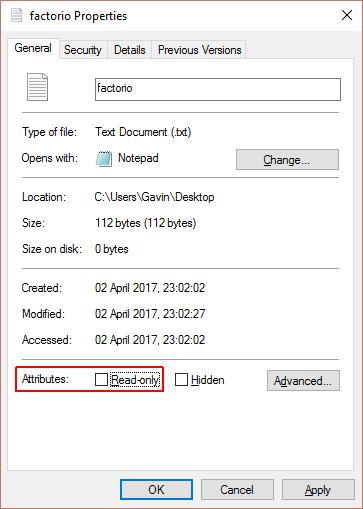
Mostly the write protect error occurs because of a single file that is marked as “read-only”. That single file can upset you. If any of your files are set to read-only mode, then you can’t just delete that file. On return, the single file can restrict you to format your USB drive.
Check For Individual Files
Locate the file that is undeletable and then right click on it and select ‘Properties’. At the bottom of the panel, under attributes, you will find the Read-only option, make sure to uncheck the “Read Only” box.
5 Method: Using Command Prompt
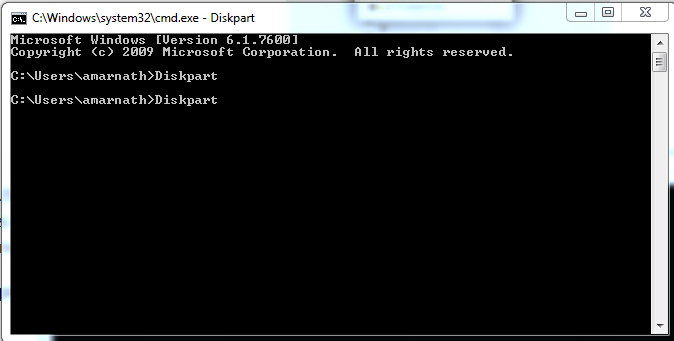
In this method, we will remove write protection from Pendrive using commands in Cmd. This will fully clean the write protection of the Pendrive.
Step 1. Click on Start->Cmd. Type Diskpart and press enter.
Using Command Prompt
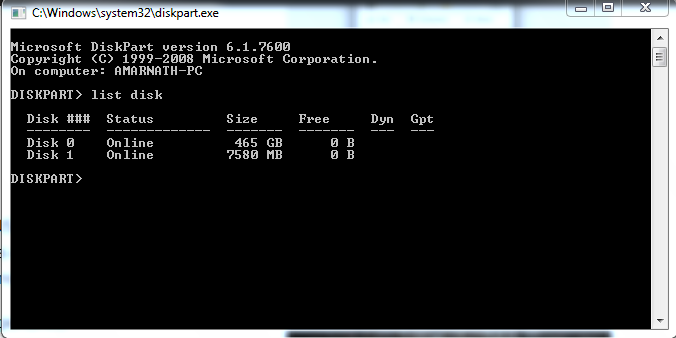
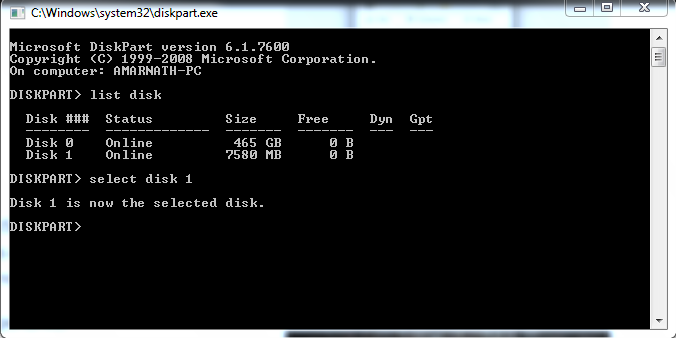
Step 2. Type list disk.
Using Command Prompt
Step 3. Type select disk 1 and this will select your Sdcard/USB Pendrive.
Using Command Prompt
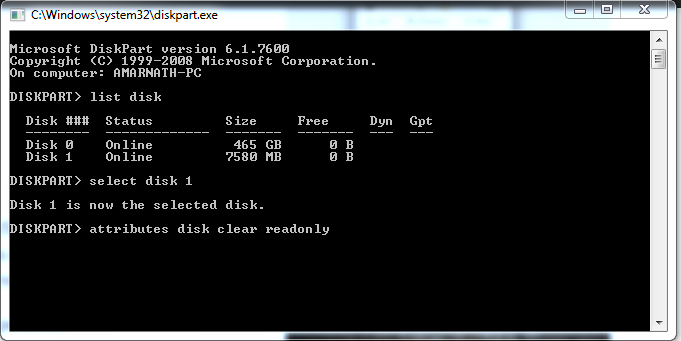
Step 4. Now type “attributes disk clear readonly” and press enter.
Using Command Prompt
Now exit from cmd and format your Sdcard/USB Pendrive. This will remove write protection from your SD card or Pendrive.
6 Method: Using Registry Editor
In this method, we will edit some registry values of computer as when they are overwritten by some reason, our media can show error message of Write Protection
Step 1. Open Run -> type Regedit -> click on Registry Editor.
Using Registry Editor
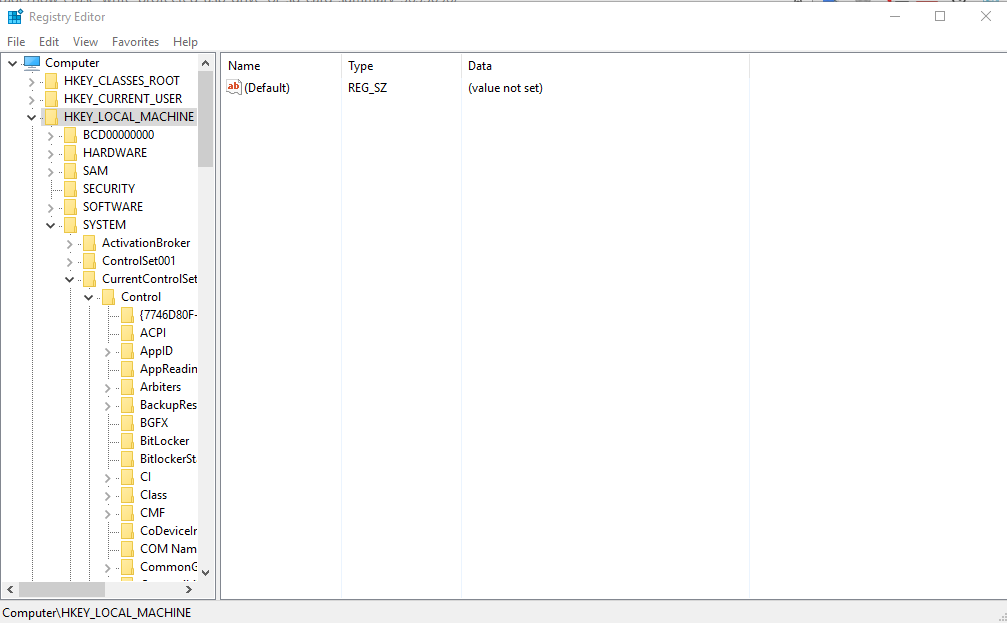
Step 2. Now follow up this path in Registry Editor
HKEY_LOCAL_MACHINE/SYSTEM/CurrentConrolSet/Control/StorageDevicePolicy
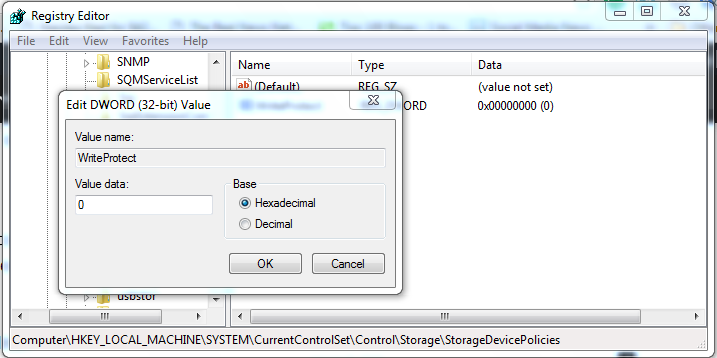
Step 3. There you will find write protection option just click on it and set its value to 0.
Using Registry Editor
That’s it! you are done. By this, the default value of write protection register will be changed and the write protection will permanently get removed from that media device.
What If You didn’t Find StorageDevicePolicies?
If you can’t find StorageDevicePolicies in Registry Editor then you can create a key For that you need to head over Registry Editor and follow this path
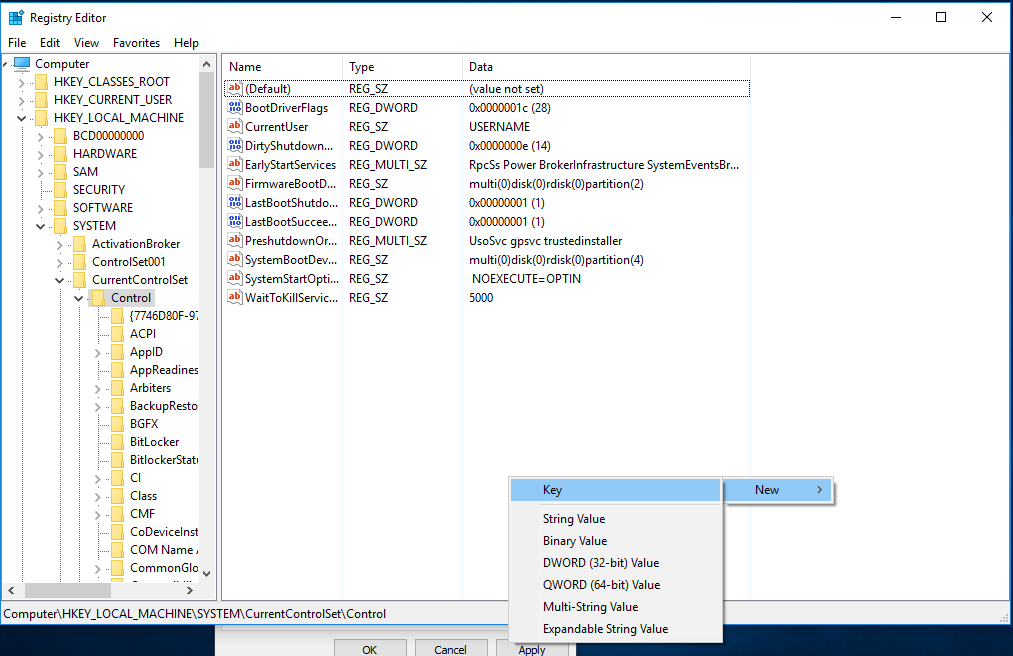
HKEY_LOCAL_MACHINE>System>CurrentControlSet>Control
Using Registry Editor
Here you need to right click on the white space in the control folder and choose New>Key and carefully enter the name “StorageDevicePolicies”
Using Registry Editor
Now double click on the newly created folder and right click and then choose New>DWORD and name it WriteProtect and set its value to 0. Click OK, exit Regedit and make sure to restart your computer.